The Ultimate Guide to Solar Panel Connectors
Solar panel connectors are incredibly critical components of a solar power system. Connectors do a lot of work in helping solar generators produce maximum power, especially by combining different parts of the solar system together. In fact, they should be resilient to harsh weather and varying voltage levels to ensure continuous power generation.
Even though different solar panel connector types — MC4, MC3, and T4 — are available, MC4 has already taken over the market. The positive locking solar wire connector MC4 eradicates the opening of connectors under load, making them one of the best connectors of 2023.
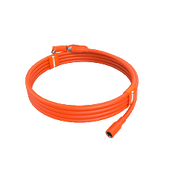
Filmed with PC material, the Jackery Solar Panel Connectors kit can withstand harsh weather and fire. Thus, they are the most suitable companions for solar connections for any outdoor applications.

In this article, we'll talk about solar panel connectors, why they are essential, and how to use them.
What Are The Solar Panel Connectors?
Simply put, solar panel connectors attach different solar system components together to produce renewable energy. Their primary role is to interconnect solar panels in PV installations and ensure power continuity throughout the solar array.
PV technology was invented in 1883 and gained popularity in 1950. However, the rise in the number of applications for PV technology led to the demand for a safe and easy-to-use solar panel connector. This was when MC3 connectors came into existence.
Invented in 1996, MC3 connectors lacked in certain aspects, like the opening of the connectors under load and the requirement for highly trained technicians. When these problems persisted, the National Electrical Code produced MC4 connectors.

The solar panel connector helps connect multiple solar panels to the power station. For instance, if you're purchasing Jackery SolarSaga Solar Panels and Explorer Portable Power Station, you can choose Jackery Solar Panel Connectors. The connector lets you establish a safe and secure connection with two or three panels simultaneously, helping you generate more power at the same time.
Why Are Solar Panel Connectors Important?
Solar panel connectors ensure that solar power systems generate efficient and safe electricity. They aim to securely connect solar panels with other system components, including built-in charge controllers and inverters. That said, it helps the system generate stable power without interruptions.
In addition, solar panel connectors reduce the electrical arcing risk, which can be a severe hazard for the solar power system. The high-quality connectors are designed to resist harsh weather conditions, including exposure to solar radiation. Lastly, the connectors for solar panels minimize electrical hot spots, which can be a reason for fire hazards. Overall, it is a protection tool that can help you securely connect the panels to a power station to generate electricity.
How To Select Solar Panel Connectors?
Choosing suitable solar panel connectors is a critical step for your solar system, as there are different connector types available.
Here are some simple things you'll need to consider while selecting a solar connector type.
Maximum Voltage
It's crucial to analyze the maximum voltage that the solar panel connectors can easily handle without any damage or failure. Always consider choosing a connector that has a voltage rating of more than that of solar panels to avoid any voltage issues.
Maximum Current
The maximum current rating defines how much current can safely flow through the connectors. It's better to select a connector that has a higher current rating than that of solar panels.
Maximum Temperature
Solar panels work efficiently when placed under peak sun rays. However, excessive heat can melt or degrade the connections, leading to inefficient power production. That is why it's vital to choose connectors that can handle harsh weather conditions and peak sunlight for long hours.
Contact Resistance
The lower the contact resistance of the connector, the more solar energy output the solar panels can produce. Double-check the contact resistance of the adapter and choose the one that aligns with your needs.
Contact Material
The material used to manufacture the connector determines its performance and durability. The best solar connectors are filmed with PC material, making them robust and long-lasting.
Ingress Protection (IP) Index
IP rating determines the level of protection that the solar panel connector offers against dust and water. The more the IP index, the better it will perform in extreme conditions.
Wire Cross-Section
The cross-section or wire size of the connector should be compatible with the wire size you'll be using in your solar system.
Keeping in mind the above factors will help you select solar panel connectors quickly.
Solar Panel Connectors Operation
Learning how to operate a solar panel connector is extremely important to ensure it works efficiently. In this connector operation section, we will discuss how to crimp a solar panel connector, lock or unlock it, and install it in parallel or in series for a secure connection.
How to Crimp Solar Panel Connectors?
First of all, you'll need to crimp the solar panel connector using a few tools, including a wire stripper, wire connector, solar connector kit, and crimping and connector tool. Once you've all the equipment, follow the below-mentioned process.
- Cut the wire to the desired length using the wire cutters.
- Use the wire stripper to strip half of an inch of wire from one end.
- Enter the stripped wire into a male pin. Now stiff the wire using a wire crimping tool.
- Insert the male pin inside the female connector and crimp it properly to fix the connection.
- Similarly, repeat the procedure with a female plug and male connector. Crimp it appropriately to secure the connection.
- Lastly, attach the male and female connectors until you hear the click.
How to Lock and Unlock Solar Panel Connectors?
The solar panel connector features a locking and unlocking mechanism to keep different parts of the solar system in place. In addition, the mechanism reduces the risk of electrical hot spots, making the connections of the whole solar array easy and secure.
To lock the solar panel connector, all you need to do is tightly connect the male and female safety pins.
Unlocking a solar connector requires pressing the ends of the locking tabs to release the locking mechanism. Now, you can pull the connector apart to unlock it completely.
How to Install Solar Panel Connectors in Series & Parallel?
Solar connectors help you connect the solar panels in parallel, series, or series-parallel. Understanding the basics of installing will help you make secure and stable connections. Before we elaborate on the steps to install solar panel connectors in series or parallel, here is what the two wirings indicate.

Series Wiring
Series wiring means connecting the positive wiring of one solar module to the negative wiring of another. In this series type, the voltage of the solar panels adds together, but the amperage remains the same.
Series connectors are utilized in systems with an MPPT controller. The advantage of connecting systems in series is that it is easier to use than other types. Below are a few steps to install solar panels in series.
- Plug the positive connector of the first solar panel module into the negative connector of the next PV module.
- Similarly, plug the negative connector of the first solar panel module into the positive connector of the last one.
- To close the end circuit, connect the remaining positive and negative leads to the solar charge controller or inverter.
Parallel Wiring
On the other hand, parallel wiring means connecting the positives of the solar panel modules together. In the parallel wiring, the voltage of the solar panels remains the same, but the amperage increases.
They are often utilized in small, basic systems with PWM charge controllers. However, it's important to use thick cables during parallel wiring. Let us see how to connect panels in parallel.
- Connect the positive leads of the solar panels with one another.
- Similarly, connect the negative leads with one another.
- Use a single solar panel connector to connect several leads together and complete the circuit.
- Now you can easily connect the solar panel connector to the inverter and complete the connection.
The Types of Solar Panel Connectors
Choosing the right type of connector depends on your needs. To help you select the best one, we have explained the most popular solar connectors: MC3, MC4, Helios H4, SolarLok, and Radox.
MC4
MC4 is by far the most popular type of connector. The UV-resistant material and high IP rating of the connector make them fully weatherproof. It comes with a locking mechanism to add an extra layer of security to the connection. You will need a special tool to unlock the connector easily. These types of solar connectors can work in all conditions. However, they are highly suitable for areas with extremely hot or humid weather conditions.
MC3
One of the most popular solar panel connectors used in the past is MC3. The connector has male and female leads that work with positive and negative leads to complete the connection. Thanks to the flexible seal, they are weatherproof and keep the connection stable.
Helios H4
Helios H4 is compatible with MC4, making it easy for homeowners to use them together. You need an assembly tool to unlock the connector. It is designed to be resistant to extreme weather conditions and UV radiation. Furthermore, it can handle high currents and voltages, making it a reliable and durable solution.
SolarLok
Also known as the Tyco connector for wires, SolarLok has become outdated these days. You can see this type of solar panel connector in old installations. They were used to connect one solar panel module to the next one either in series or in parallel, depending on the solar array configuration.
Radox
Radox is built with high-quality beryllium copper to conduct electricity. It features UV and ozone resistance, a high mechanical resistance, and an easy assembly system. The design of the solar connector ensures the proper passage of current through the solar panel wires.
What Are The Differences Between MC4 & MC3?
MC3 was designed before MC4, meaning the latter is an improved version of MC3. Here are a few main differences between the two widely used solar connector types.
- Ingress Protection (IP) rating:The main difference between both connectors is the IP or ingress protection rating. The MC3 connector has an IP rating of IP65 index that secures the cable from dust and low-pressure water sources. On the other hand, MC4 protects the wire against unfavorable conditions like heavy winds, water, etc.
- Locking System:The MC3 offers no protection against disconnections, often leading to an electric arc. Alternatively, MC4 is equipped with a positive locking system. You need an assembly/disassembly tool to separate it.
Compared to MC3, MC4 solar panel connector type is a much safer option. It is an ideal option for any length of solar cable, making them versatile.
Comparison of Solar Panel Connectors Types
Here is a quick breakdown of different types of solar panel connectors based on important factors.
|
Parameters |
MC4 |
MC3 |
Helios H4 |
SolarLok |
Radox |
|
Cable Cross Section |
2.5-10 |
2.5-10 |
2.5-6 |
4 - 6 |
4 - 6 |
|
Contact Material |
Tin-plated copper |
Tin-plated copper |
Tin-plated copper |
Tin-plated copper |
Tin-plated brass |
|
Rated Current |
39 - 104 A |
20 - 43 A |
15 - 45 A |
20 - 30 A |
38 A |
|
Maximum Voltage |
1000 V |
1000 V |
1500 V |
1500 V |
1000 V |
|
Maximum Temperature |
105 °C |
105 °C |
120 °C |
- |
85 °C |
|
IP Index |
IP67 |
IP65 |
IP68 |
IP65 |
IP68 |
|
Safety Class |
II |
II |
II |
II |
II |
|
Safety Mechanism |
Plug lock |
None |
Plug lock |
Plug lock |
Twist lock |
|
Locking/Unlocking Tool |
Useful but not necessary |
Not required |
Required |
Required |
Not required |
Jackery Solar Panel Connector
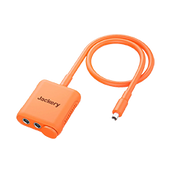
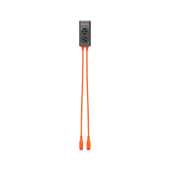
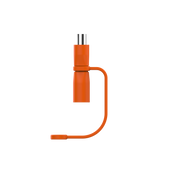
Jackery solar panel connector has 1 * male and 3 * female ports used as a solar extension. The solar panel connector kit is made with PC material, making them extra durable. They can withstand harsh weather conditions. In addition, it features a change-over cover that allows you to switch between two and three solar panels with a few clicks.

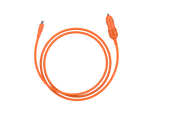
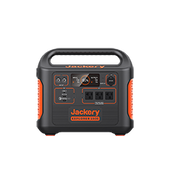
The aim of the solar panel adapter is to connect the solar panels to the portable power station. For instance, you can use the Jackery solar panel connector to connect Jackery SolarSaga 200W Solar Panels with Explorer 2000 Pro Portable Power Station.
Jackery Solar Generator 2000 Pro is a portable and durable power solution that allows you to charge 96% of home appliances during power outages and outdoor adventures. Here is how you can use the solar panel adapter in four simple steps.
- First, unfold the solar panels and use the kickstands to adjust their tilt angle.
- Next, plug the solar panel charging output port of the connector into the DC input port of the Jackery Explorer 2000 Pro Portable Power Station.
- Then, you can plug the solar panel charging input port of the connector into all the Jackery SolarSaga 200W solar panels.
- The change-over switch helps you change two to three solar panels in series. If you are using two solar panels to charge the power station, you need to keep the switch OFF. Alternatively, if the switch is ON, you must connect three solar panels in series.

Solar Panel Connectors FAQs
The best way to leverage the power of a solar power system is by using a connector or adapter. Two or three solar panels are connected together to maximize the power output. Now that you know everything about the connectors, here are a few common questions.
How to choose an MC4 PV connector?
Below are a few things to consider while choosing an MC4 PV connector.
- Check the voltage and current rating of solar panels and connectors to ensure they are compatible with the solar array.
- It should be capable of withstanding high moisture, temperature fluctuations, and UV radiation.
- Connectors should be made with durable materials that can withstand the mechanical stress of installation.
- The solar panel connector should be certified by recognized testing and certification organizations, such as TUV.
How to figure out where plus and minus are on solar panels?
There are two simple methods to find plus and minus terminals.
- Look at the Diode: You can find one bypass diode in the junction box. The striped cathode of the diode will point towards the positive side of the solar panel. The other side will be a negative terminal.
- Measure with Voltmeter:To identify the solar panel terminals with a voltmeter, put the positive red meter lead on one side and the negative on another. Set the voltmeter to DC volts. If the voltmeter indicates a minus sign, probably the leads are in the wrong direction. Switch them over to reveal the positive sign. Now the red meter lead is on the positive side, and the black is on the negative.
How to replace a solar panel connector?
Replacing any type of solar panel connector is easy. However, it is important to follow the below-mentioned steps to avoid any faults in replacement.
- Cut the old connector with a cable cutter and remove half an inch of insolation from the cable tip.
- Unscrew the cap to disassemble the connector.
- Put the wire through the cap and repeat the process with a cable gland.
- Secure the pin in the appropriate slot of the crimping tool and then put the exposed cable end into the cavity. Softly hold the cable in place and press the pin to the wire for crimping.
- Join the component with the rest of the connector by screwing. They will always meet in the middle.
- Lastly, tighten the connection. Pull it off to see if it is secure.
How does Jackery solar panel connector work?

Jackery solar panel connector features one male and three female connectors. Using the connector, you can connect two or three Jackery SolarSaga Solar Panels in series to charge the portable power station.
The best part about the Jackery solar panel connector is the change-over cover feature that helps you switch between the panels easily. It connects Jackery Explorer 2000 Pro with multiple SolarSaga 100W Solar Panels to generate maximum power.
Final Thoughts
Selecting the best solar panel connector will ensure your solar power system works seamlessly and generates power for decades. However, multiple solar panel connectors make it hard to choose the right product.
Understanding different types of solar connectors and their advantages will help you choose the one that fits your needs and preferences. If you are still unsure, you can explore the features of Jackery solar panel connectors.
Jackery solar panel connector helps you combine Explorer 2000 Pro Portable Power Station with SolarSaga 200W Solar Panels. The reliable and durable power solution allows you to power 96% of your home appliances during outdoor camping or power outages.
Sign up for our newsletter to get exclusive discounts, promotional offers, and deals on all the Jackery products.
Disclaimer:
The runtime mentioned for appliances powered by Jackery is for reference only. Actual runtime may vary under different conditions. Please refer to real-world performance for accurate results.












![[Add-on] Jackery Manual Transfer Switch for Explorer 5000 Plus](http://ca.jackery.com/cdn/shop/files/add-on-jackery-manual-transfer-switch-for-5000-plus-240V.webp?v=1757043692&width=170)
