


![[Add-on] Jackery Manual Transfer Switch for Explorer 5000 Plus](http://ca.jackery.com/cdn/shop/files/add-on-jackery-manual-transfer-switch-for-5000-plus-240V.webp?v=1757043692&width=170)


Understand RV Wiring Diagram: Jackery Power Solution
Installing solar panels on your RV roof is one of the best ways to go green and power appliances during outdoor adventures. The trick, however, is to understand the solar RV wiring diagram. If you want to convert your RV into a solar-powered vehicle, it’s vital to connect the electrical components appropriately to avoid loose connections and damage.

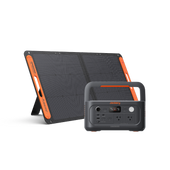
If manually setting up the complex electrical system seems confusing, consider choosing Jackery Solar Generators. These alternative power solutions for RVs are portable and easy to set up. Jackery Solar Generator 3000 Pro is the ultimate power solution that can charge 99% of outdoor appliances.
|
Jackery Solar Generator 3000 Pro |
 |
|
- 3024Wh that can power up to 99% of outdoor appliances. - Can be charged using Jackery SolarSaga 200W Solar Panels. - Features pull rods and double wheels for easy portability. - Fully upgraded BMS for extra safety. - 30% smaller and lighter than other products of similar capacity. |
RV Wiring Diagram Basics
The RV wiring diagram describes all the electrical components and connections required to install a power source in your recreational system.
RV Wiring Power Sources
There are different power sources available to charge the RV and appliances. Some of the most common power sources include the following:
Shoreline (AC): RV typically draws power from the AC sources at 120V. However, it’s worth noting that 120V is the rounded estimate, and you may see some variations in shoreline power pedestals.
Generators (AC): The gas-guzzling generators can provide the same 120V AC power from a shoreline connection. However, the AC power source produces a lot of noise while working.
Solar Panels (DC): Many RV owners install solar panels, as these are eco-friendly and cost-efficient solutions to generate electricity. They can generate 12V of DC power to recharge RVs batteries or power stations.
Wind Generators: Wind generators are cheaper to set up than solar panels. However, you’ll have to deal with a bit of a complex implementation.
Engine’s Alternator: It is one of the ways to power an RV. However, alternators are less preferred compared to generators, especially those generators that work on solar energy.
Solar generators combine solar panels and a rechargeable power station. While solar power panels convert sunlight into electricity, the rechargeable battery stores it for later use. Jackery is one of the top solar brands manufacturing premium quality solar products. You can power most outdoor appliances in your RV using the powerful Jackery Solar Generator 3000 Pro.
RV AC Vs. DC Power
You can mainly power the RV with two electrical systems, AC and DC. AC, also called alternating current, supplies power to brick-and-mortar homes. It flows back and forth, making it a less stable powering solution.
That’s why we often use AC to DC converters to make the received power compatible with charging devices. Contrary to AC, DC is a more stable power source. However, one thing to note is that transmitting direct current over long distances is difficult.
RV Converter Vs. Inverter
The terms converter and inverter are used interchangeably, but they are different. The converter converts 120V AC power to 12V direct current.
On the contrary, the role of an inverter is to convert DC power in the RV’s battery bank to AC. This helps you to run appliances that require 120V AC power.
RV Wiring Diagram Components
Here is the list of essential components in a solar RV wiring diagram.
Solar Panels: Connected over the RV roof, these panels convert solar energy into electricity. There are portable solar panels available on the market that allow you to charge the battery without roof installation.
Charge Controller: The device controls electricity flow from solar panels to the battery bank.
Battery Bank: The device is responsible for storing power produced by the solar panels to charge the appliances.
Inverter: Its role is to convert DC to AC, which can then power different home or outdoor appliances.
Fuses & Connectors: These devices help connect the solar system components together.
Some optional parts required in the solar RV wiring diagram include:
- Solar panel mounts
- Solar panel extension cable
- Battery Monitor
- Alternator charging options like B2B charger or battery isolator
DIY RV Wiring Diagrams
The RV solar wiring diagram can be confusing, especially if you are trying it for the first time. Before you start the installation, you will need to understand the wiring color code, types of transfer switches, and required components.
RV Wiring Color Code
The RV wiring color code is the standardized set of colors that helps to identify different electrical wires in an RV. Learning the color codes will help you ensure electrical wiring is installed correctly.
|
7-way |
6-way |
5-way |
4-way |
Function |
Color |
Min Wire |
Gauge |
Where To Attach (Vehicle Side) |
Where To Attach (RV Side) |
|
Right Turn |
Green |
18 |
16 |
Vehicle wiring harness (right turn) |
RV’s right turn signal
|
||||
|
Left Turn |
Yellow |
18 |
16 |
Vehicle wiring harness (right turn) |
RV’s left turn signal |
||||
|
Ground |
White |
16 |
12 |
Vehicle ground point (metal, uncoated, and rustproof) |
RV’s ground point (metal, uncoated, and rustproof) |
||||
|
Tail / Marker |
Brown |
18 |
16 |
Vehicle wiring harness (taillight) |
RV’s taillights |
||||
|
|
Brake |
Blue |
18 |
12 |
Electric brake control, power for brakes |
Breakaway switch |
|||
|
|
Battery |
Red or Black |
|
12 |
Fuse block or FUSED battery lead |
Breakaway kit, interior lights, and battery charger |
|||
|
|
Backup |
Purple |
|
16 |
Vehicle wiring harness (backup circuit) |
Backup lights / hydraulic coupler |
2-Way & 3-Way Transfer Switches
An automatic transfer or changeover switch will help you connect all the components in your RV wiring.
2-Way Transfer Switches: These switches alter the power output between inverter or shoreline power, ensuring your RV gets the power supply.

3-Way Transfer Switches: The transfer switches change the power output between shoreline power, a generator, and an inverter (and battery bank) to supply the energy required by the RV.

DIY Solar RV Wiring Diagrams
Below we cover how to connect the components, like solar panels, battery banks, charge controllers, etc., for your solar RV system.
100W Solar Wiring Diagram
You can power many small appliances like cell phones, LED lights, etc., with a 100W solar panel system.
Components
- Solar panel (100W)
- Charge controller
- 300W pure sine wave inverter
- 50Ah Lithium battery

200W Solar Wiring Diagram
With a 200W solar system, you can power small 12V appliances, like a sink pump, several lights, a laptop, etc.
Components
- Two solar panels (100W)
- Charge controller
- 100Ah Lithium battery
- 600W or 1000W Pure sine wave inverter

300W Solar Wiring Diagram
A 300W solar wiring system helps you power various appliances, such as sink pumps, vent fans, cell phones, etc.
Components
- Three 100W Solar panels (wired in series)
- Two batteries connected in parallel
- 600W or 1000W inverter
- 12-circuit fuse block and bus bar

400W Solar Wiring Diagram
The medium-sized solar system is suitable for RVs and travel trailers. In addition, you can power several small electronic devices, portable refrigerators, vent fans, etc.
Components
- 400W solar panels
- Charge controller
- Two batteries of 100Ah or 200Ah
- 600W, 1000W, or 1500W pure sine wave inverter

Large Solar Wiring Diagram
If you want to set up a sizable solar wiring system, the battery bank of the lithium batteries should be connected in parallel. On the contrary, you can join the AGM batteries with their bank in series.
Components
- Solar panels
- Charge controller
- 4*400Ah 6V AGM batteries or 4*100Ah 12V Lithium batteries
- 600W, 1000W, or 1500W pure sine wave inverter
- 6-way fuse block and bus bar
- Battery terminal connector

Jackery RV Solar Power Solutions
When it comes to RV solar wiring diagrams, there are multiple complex connections and components. Most times, it’s essential to call experts for professional installations. For this reason, many RV owners are switching to an alternative power solution — solar generators. They are easy to set up and require no professional help.

Jackery offers the finest range of high-quality solar generators. They combine Jackery SolarSaga Solar Panels and Explorer Portable Power Station to absorb, convert, and store electricity to power appliances.
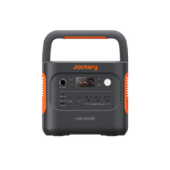
Jackery Solar Generator 2000 Pro
Best known as the fastest recharging solution, Jackery Solar Generator 2000 Pro can power 96% of outdoor appliances. The first-rate lithium battery houses two chips and four temperature core detectors to take safety to the next level.
|
Series |
Capacity |
Recharging Time |
Ports |
Appliances |
|
Solar Generator 2000 Pro |
Lithium-ion 50Ah/43.2V (2160Wh) |
AC Adapter: 2 Hours 12V Car Adapter: 24 Hours 6x SolarSaga 200W Solar Panel: 2.5 Hours 4x SolarSaga 200W Solar Panel: 4 Hours |
AC Output: 120V, 60Hz, 2200W (4400W Peak) USB-A Output: Quick Charge 3.0, 18W Max USB-C Output: 100W Max, (5V, 9V, 12V, 15V, 20V up to 5A) Car Output: 12V, 10A AC Input: 120V, 60Hz, 15A Max DC Input: 11V-17.5V, 8A Max, Double to 8A Max 17.5V-60V, 12A, Double to 24A/1400W Max |
Can charge 96% of outdoor appliances. |
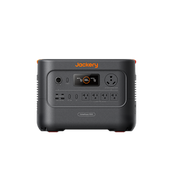
Jackery Solar Generator 3000 Pro
The ultimate solar solution features a 3024Wh battery that can keep 99% of your outdoor gear charged. With the help of six Jackery SolarSaga Solar Panels, you can power the solar generator in 3-4 hours. Not only can the power station charge RVs, but it can also be a reliable option during power outages.
|
Series |
Capacity |
Recharging Time |
Ports |
Appliances |
|
Solar Generator 3000 Pro |
70Ah/ 43.2V DC(3024Wh) |
AC Adapter: 2.4H 12V Car Adapter: 35H 6x SolarSaga 200W Solar Panel: 3-4H 4x SolarSaga 200W Solar Panel: 5-6H |
4x AC Output: 120V~ 60Hz 20A Max 1x AC Output: 120V~ 60Hz 25A Max 2x USB-C Output: 100W Max, 5V⎓3A, 9V⎓3A, 12V⎓3A, 15V⎓3A, 20V⎓5A 2x USB-A Output: Quick Charge 3.0, 18W Max, 5-6V⎓3A, 6-9V⎓2A, 9-12V⎓1.5A Car Port: 12V,10A Max AC Input: 120V, 60Hz, 15A Max DC Input: 2x DC 8mm Ports: 11-17.5V (Working Voltage)⎓8A Max, Double to 8A Max; 17.5-60V (Working Voltage)⎓12A, Double to 24A/1400W Max |
Can charge 99% of appliances. |
RV Wiring Diagram FAQs
How many solar panels do I need for my RV?
Determining the number of solar panels will depend on how many electronic appliances you want to power with solar. For instance, 100 watts of panels can help you power small gadgets like smartphones, while you’ll need multiple solar panels and a rechargeable battery to charge other large appliances in your RV.
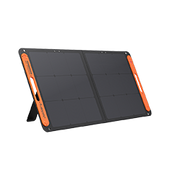
Jackery SolarSaga Solar Panels are built with advanced solar cells that make them highly efficient. You can combine the panels with a high-capacity Jackery Explorer Portable Power Station to charge multiple outdoor devices in your RV.
How does the wiring system work in an RV?
The large power cable connecting the RV to the shore power transmits nearly 120V power to the breaker panel of the vehicle. It then distributes the power to RV’s converter, allowing you to charge batteries and appliances. However, you can only access DC once you have unplugged your RV.
How to wire or install an RV solar system?
Here are some steps to wire or install an RV solar system.
- Mount the solar panels to the RV roof in series or parallel.
- Next, connect the charge controller to the RV battery bank.
- You can connect wires from the solar panels to the charge controller using a circuit breaker.
- Connect the battery bank and charge the controller.
- Double-check the wiring and plug in the solar panels.
- Seal the holes you might have created during the solar panel installation.
- If you want to add an inverter to the solar system, connect it close to the battery bank.
Wiring or mounting the solar-powered RV involves multiple complex steps. But that’s not the case with Jackery Solar Generators. They are easy to set up and require no complicated wiring. You can connect solar panels to the power station to start charging your devices in minutes.
Final Thoughts
We hope the RV wiring diagram guide has helped you understand how to connect different components and install or mount the panels on the vehicle’s roof. However, finding proper parts, building connections, and permanently installing the panels can be overwhelming. That’s why investing in portable and flexible solar generators is highly preferred.
Jackery Solar Generators are ideal for RV owners wanting to power outdoor gadgets using solar energy. The ultimate power solution, Jackery Solar Generator 3000 Pro, can charge 99% of outdoor appliances for long hours. It has a built-in charge controller and inverter, so you don’t have to stress about installing them separately.
Disclaimer:
The runtime mentioned for appliances powered by Jackery is for reference only. Actual runtime may vary under different conditions. Please refer to real-world performance for accurate results.