


![[Add-on] Jackery Manual Transfer Switch for Explorer 5000 Plus](http://ca.jackery.com/cdn/shop/files/add-on-jackery-manual-transfer-switch-for-5000-plus-240V.webp?v=1757043692&width=170)


Ice fishing carries risks of inconsistent freezing and hidden weak spots. Misjudging conditions can instantly turn a recreational outing into a survival situation. To mitigate risk, you must learn to read the ice, verify stability, and carry the right safety equipment.
Understanding Ice Formation and Strength
Ice is never 100% safe. Its stability changes constantly based on environmental factors, meaning conditions can shift drastically within a few feet or a few hours.
What Factors Affect Ice Stability?
- Temperature History: Consistent sub-zero temperatures create the strongest ice. Freeze/thaw cycles create weak, honeycombed layers that can crumble under weight despite appearing thick.
- Water Body Type: Still waters freeze more evenly. Moving water erodes ice from below, making areas with currents unpredictable and often significantly thinner.
- Local Features: Docks, logs, and vegetation absorb solar heat. This creates weak zones or "rotten" ice around the object, even in freezing temperatures.
- Snow Cover: Snow acts as insulation, slowing the freezing process of the water below. It also obscures visual warnings like wet cracks.
- Water Levels: Fluctuating levels create dangerous air gaps between the ice and water. This leads to "shell ice," where a thin top layer hides a hollow, unsupported space.
How Do Color and Quality Indicate Safety?
- Clear Blue/Black Ice: The strongest type and the baseline for safety charts. It forms when water freezes directly and slowly.
- White (Snow) Ice: Has roughly 50% the strength of clear ice. This opaque ice forms when wet snow freezes over existing ice, trapping air bubbles.
- Gray Ice: Indicates rotting or melting. It signals the presence of slush or moving water, making it unsafe for any activity regardless of thickness.
- Visual Checks: Color uniformity is the primary safety indicator. Avoid wet cracks, slushy patches, and pressure ridges.
What Conditions Weaken Thick Ice?
- Undercurrents: Springs and inlets erode ice from the bottom up. This invisible erosion means a spot safe yesterday may be dangerous today.
- Stationary Loads: Heavy items like ice shacks fatigue the ice sheet over time. Move gear periodically to prevent the ice from deforming and breaking.
- Drilled Holes: Drilling reduces load-bearing capacity. Clustering holes in a small area creates a "Swiss cheese" effect that compromises structural integrity.
Recommended Minimum Ice Thickness Guidelines
Adhering to established ice thickness safety standards is non-negotiable. These measurements apply strictly to clear, solid blue ice.
What Are the Minimum Thickness Guidelines?
|
Thickness |
Permissible Activity |
|---|---|
|
Under 4 in (10 cm) |
Stay off. Unsafe for any foot traffic or fishing. |
|
4 in (10 cm) |
Minimum for walking and individual fishing. |
|
5–7 in (12–18 cm) |
Snowmobiles and ATVs (check specific machine weight). |
|
8–12 in (20–30 cm) |
Cars and small pickups (drive slowly). |
|
12–15 in (30–38 cm) |
Medium trucks and larger pickups. |
How Should You Adjust for Quality and Load?
- White Ice Rule: White ice requires double the thickness of clear ice to be safe. If 4 inches of clear ice is safe for walking, you need at least 8 inches of white ice to support the same weight safely.
- Group Safety: Group safety requires spreading out to distribute weight. Anglers often congregate over productive fishing spots, but clustering people and heavy gear creates concentrated stress on the ice sheet.
- Vehicle Spacing: Vehicle spacing should be at least 50 feet to prevent localized collapse. When driving on the ice, maintaining significant distance displaces weight stress and prevents fatigue on the sheet.
Essential Safety Practices and Gear
Preparation is the primary defense against accidents. Carrying the right gear, such as must-have fishing gear accessories, and testing conditions actively ensures you stay on top of the ice, not under it.
How Should You Test the Ice?
- Test Frequently: Test ice thickness every 150 feet when moving across unknown water. Never assume thickness is uniform, as conditions can change rapidly near shoals or hidden springs.
- Spud Bar: A spud bar probes the ice for stability ahead of your steps. Strike the ice hard; a solid thunk indicates stability, while a hollow sound or water seeping through requires an immediate retreat.
- Auger: An auger drills test holes to reveal ice layers. This allows you to see the distinct layers of clear versus white ice for accurate measurement.
- Measurement Tools: Tape measures verify depth instantly. Hook the end under the ice lip in your test hole to confirm the ice meets ice thickness safety requirements.
Why Are Communication and Planning Crucial?
- Buddy System: The buddy system is your primary rescue asset. Never fish alone; if you must go alone, stay within sight of other anglers.
- Float Plan: A float plan details your location and return time. Inform someone on shore of these details so they can alert emergency services with specific coordinates if you do not check in.
- Local Intel: Local bait shops provide current ice conditions. Check reports from these shops or conservation authorities before heading out for the most up-to-date information on active cracks.
What Personal Safety Equipment Do You Need?
- PFD/Float Suit: A PFD provides buoyancy and thermal protection. Wear a Personal Flotation Device or dedicated float suit at all times to keep your head above water and delay hypothermia.
- Ice Picks: Retractable ice picks allow self-rescue from the water. Wear these around your neck to grip slick ice and pull yourself out if you fall in.
- Throw Rope: A throw rope enables rescue from a safe distance. This weighted rope allows you to assist others without approaching the hole and risking a secondary breakthrough.
- Whistle: A pealess whistle signals distress in high winds. Use it to alert others if your voice carries poorly or you are incapacitated.
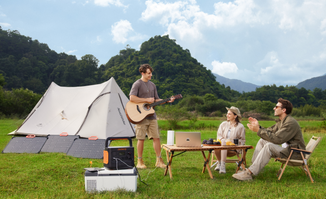
- Portable Power: Portable power ensures communication devices function in cold weather. A reliable power source keeps phones and GPS units charged for navigation and emergencies.
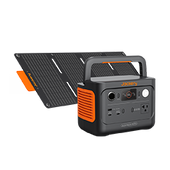
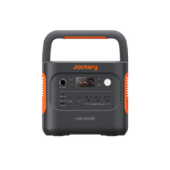
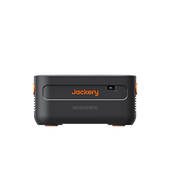
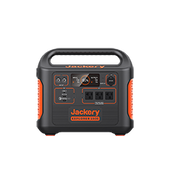
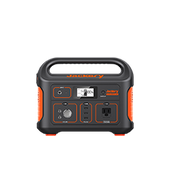
Jackery Solar Generator 1500 v2
- Capacity: Jackery Explorer 1500 v2 Portable Power Station features a 1536Wh LiFePO4 battery to run heaters and fish finders.
- Output: The unit delivers 2000W output (4000W Surge) to handle high-demand gear.
- Durability: This generator offers a 10-year lifespan with 6,000+ charge cycles.
- Safety: UPS < 10ms backup ensures seamless power for safety devices.
- Use Case: Keep the Jackery Explorer 1500 v2 in your sled to guarantee power for calling help.

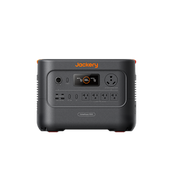
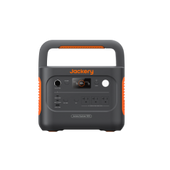
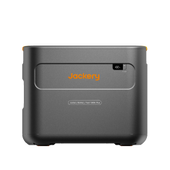
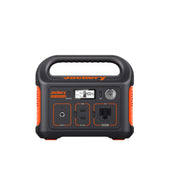
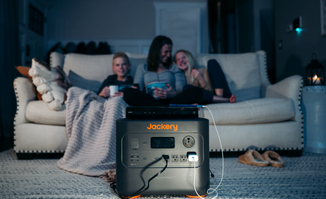
Jackery Solar Generator 2000 v2
- Capacity: Jackery Explorer 2000 v2 Portable Power Station features a 2042Wh LiFePO4 battery to run heaters and fish finders.
- Output: The unit delivers 2200W output (4400W Surge) to handle high-demand gear.
- Durability: This generator offers a 10-year lifespan with 4,000 cycles to 70%+ capacity.
- Safety: UPS < 20ms backup ensures seamless power for safety devices.
- Use Case: Keep the Jackery Explorer 2000 v2 in your sled to guarantee power for calling help.
For more on integrating technology into your trips, read our guide on ice fishing safety tips.
Which Hazardous Areas Should You Avoid?
- Inlets/Outlets: Inlets and outlets have thin ice due to moving water. Avoid areas where water flows into or out of the lake, as this delays freezing from below.
- Pressure Ridges: Pressure ridges indicate shifting plates and instability. These uneven, buckled areas often hide open water and should be crossed only at designated safe points.
- Objects: Docks and bridge pilings absorb solar heat. Stay clear of these objects as they melt surrounding ice, creating invisible traps.
Emergency Preparedness and Response
Knowing exactly what to do when ice fails can save your life. Panic is the enemy; deliberate action is the solution.
How Do You Perform a Self-Rescue?
- Calm Down: Control breathing immediately to combat cold water shock. You have a few minutes before hypothermia sets in—use them to think rather than panic.
- Orient: Locate the exit point by looking for the contrast in light. Do not swim aimlessly under the ice; head toward the hole where you fell in.
- Kick and Pull: Kick feet vigorously to get horizontal. Use ice picks to anchor into the solid edge and pull yourself onto the ice rather than trying to lift vertically.
- Roll Away: Roll away from the hole to distribute weight. Do not stand up immediately; rolling spreads mass over a larger surface area to prevent the weakened edge from breaking again.
How Do You Rescue Others Safely?
- Call 911: Contact professionals immediately for cold water rescue.
- Do Not Approach: Resist the instinct to run to the victim. Standing near the hole may cause a secondary breakthrough.
- Reach or Throw: Use a throw rope or long branch to reach the victim. Lie down on the ice to distribute weight while assisting them from a safe distance.
What If Your Vehicle Breaks Through?
- Exit Immediately: Exit through open windows or doors instantly. Do not wait for the vehicle to fill with water; it may float briefly, but it will sink.
- Distribute Weight: Crawl away on hands and knees once out of the vehicle. Get to safe ice before standing up to avoid breaking through again.
Practical Field Checklists
Pre-Trip Safety Check
- Verify local ice reports and weather forecast.
- Confirm partner availability and share float plan.
- Pack PFD, ice picks, spud bar, and throw rope.
- Ensure communication devices are charged and backup power is packed.
On-Ice Routine
- Probe ice immediately upon stepping off the bank.
- Measure thickness regularly as you move deeper.
- Mark any weak spots or holes for visibility on the return trip.
Frequently Asked Beginner Questions
Can I rely on visual checks?
No. Clear and thin ice often look identical; physical measurement is mandatory to ensure safety.
What is 'rotten' ice?
Late-season ice melting internally. It may appear thick but has a honeycomb structure that crumbles under weight.
Why do I need a float suit?
It provides buoyancy and thermal protection, significantly increasing survival odds against drowning and hypothermia.
How does refrozen slush impact strength?
It has only 50% the strength of clear ice due to air pockets that reduce load-bearing capacity.
Can ice be too thick to be safe?
Yes. Extreme thickness can cause internal stress, leading to sudden, unpredictable buckling or cracks.
How do I choose the right PFD?
Select a model designed for cold water immersion that fits over layers without restricting movement.
Conclusion
No ice is ever 100% safe. Success relies on constant vigilance and strict adherence to ice thickness safety rules. Always prioritize safety gear and testing over fishing. The fish will be there next time; a cancelled trip is far better than a rescue situation.


